
 I knocked out the expansion to my Blood Angels force in about 14 hours, spread over three weeks. It seems only fair, therefore, that I should have recorded the process for sharing. I did.
I must remind all of you that my 'army painting' is meant to be effective and fast. If you are looking to win a Golden Daemon trophy, go visit Dave Taylor's site. Here, in this article, you'll see how to paint an army quickly and well. Now that the momo disclaimer bit is done...
Here are the materials you'll need for this clinic:
Wash Brush, Standard Brush, Fine Detail Brush, Citadel Spray Gun, White Spray Primer, Mechrite Red, lots of Blood Red paint, Fiery Orange, lots of Baal Red wash, Boltgun Metal, Badab Black wash, Mithril Silver, Chaos Black, Codex Grey, Dark Angel Green, Snot Green, Scorpion Green, Skull White, Dheneb Stone, Gryphonne Sepia wash, Shining Gold, Chestnut Ink (or Devlan Mud), Shadow Grey, Space Wolf Grey, a priming tray, cup of clean water, a painting palette, and paper towels.


 3. Once the Blood Red layer dried (I waited about an hour before I remembered), use the standard brush to line highlight everything with Fiery Orange. If you don't have Fiery Orange, just mix some Sunburst Yellow into Blazing Orange. Also, don't worry about being 'neat' with this step- the wash will make everything better!


4. Using the Wash Brush, wash all the models heavily with Baal Red wash. I used two pots of it, and even double-washed the vehicles. The dry time on this step was the most brutal, taking a couple of hours (mostly because of the vehicles).


5. Next is basecoating Boltgun Metal onto all boltguns, backpack machinery, and other random details. On the vehicles, don't forget the wheels. While doing this step, try not to get any silver onto any red. But don't worry if you do, Mechrite Red solves this problem later.
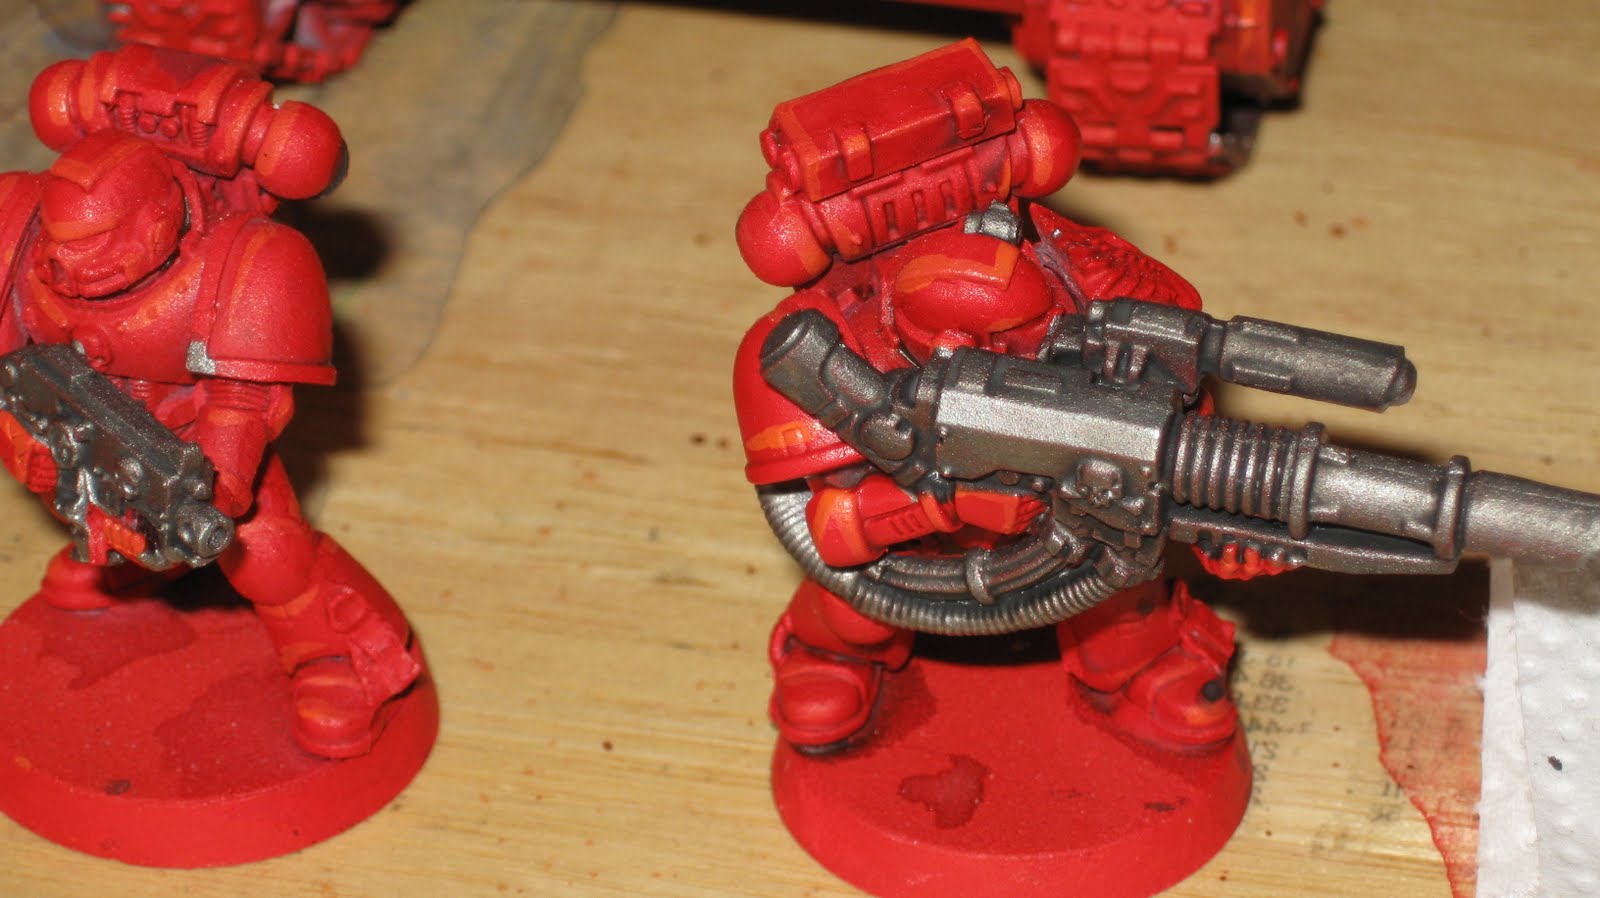

6. Once the Boltgun Metal layer is dry, wash it completely with Badab Black wash using the wash brush.
7. With the Fine Detail brush, line highlight the metal areas with Mithril Silver.

 8. Next, basecoat the gun casings, chest eagles, and shoulder pad trim (as well as other small details such as ropes and such) with Chaos Black.
 9. Using the Fine Detail Brush, line highlight the black with Codex Grey. Finer lines lead to better detail, so try very hard to be careful. I mixed Chaos Black and Codex Grey together to make a 'transition color' for the sergeant's shoulder pads, as they needed more.
 10-11. Basecoat the wings on shoulder pads and backpacks (and vehicles, to be fair) with Shadow Grey. This can be done with the Standard Brush. At the same time, basecoat the purity seals and banners with Dheneb Stone.


12-13. Wash the Dheneb Stone with Gryphonne Sepia twice using the wash brush. Once dry, line highlight with the Fine Detail Brush.
14-15. Using the Fine Detail brush, highlight the grey wings with Space Wolves Grey. After that, do a final highlight using Skull White.


 23-26. Following the 'gem' painting technique, paint the blood drops on shoulder pads and such with Blood Red mixed with Chaos Black, highlight with Blood Red, highlight again with Fiery Orange, and finish with the dot of Skull White in the dark corner. I also like to finish with 'ardcoat (or varnish) just to add that extra shininess, but that's not necessary.
27. Go back and touch up everything you messed up. I focused on the red, since Blood Angels are rather well known for that. Using a Standard Brush and Mechrite Red, I painted over any 'splotches'.


And there ya have it, a bunch of fully painted, really simple, great-looking Blood Angels!
what a waste of models. learn to paint.
ReplyDeleteThanx, man! I appreciate it... :-)
DeleteI do like me some Bob Ross and, in fact, paint up his nature scenes (all thanx to DVR and public channels!). I actually idolize Mr. Ross and wish I could paint as well as he did.
In the meantime, I'm always learning. If you have some pointers (including how to get a camera to work in my hands, I'd REALLY appreciate that) I would be excited to get some.
Ignore that idiot. I'd like to see him do any better, probably has the attention span of a fruit fly. These are great, well done, have a great time playing with them.
ReplyDelete