Thursday, February 24, 2011

Basic Training: Basic Bases

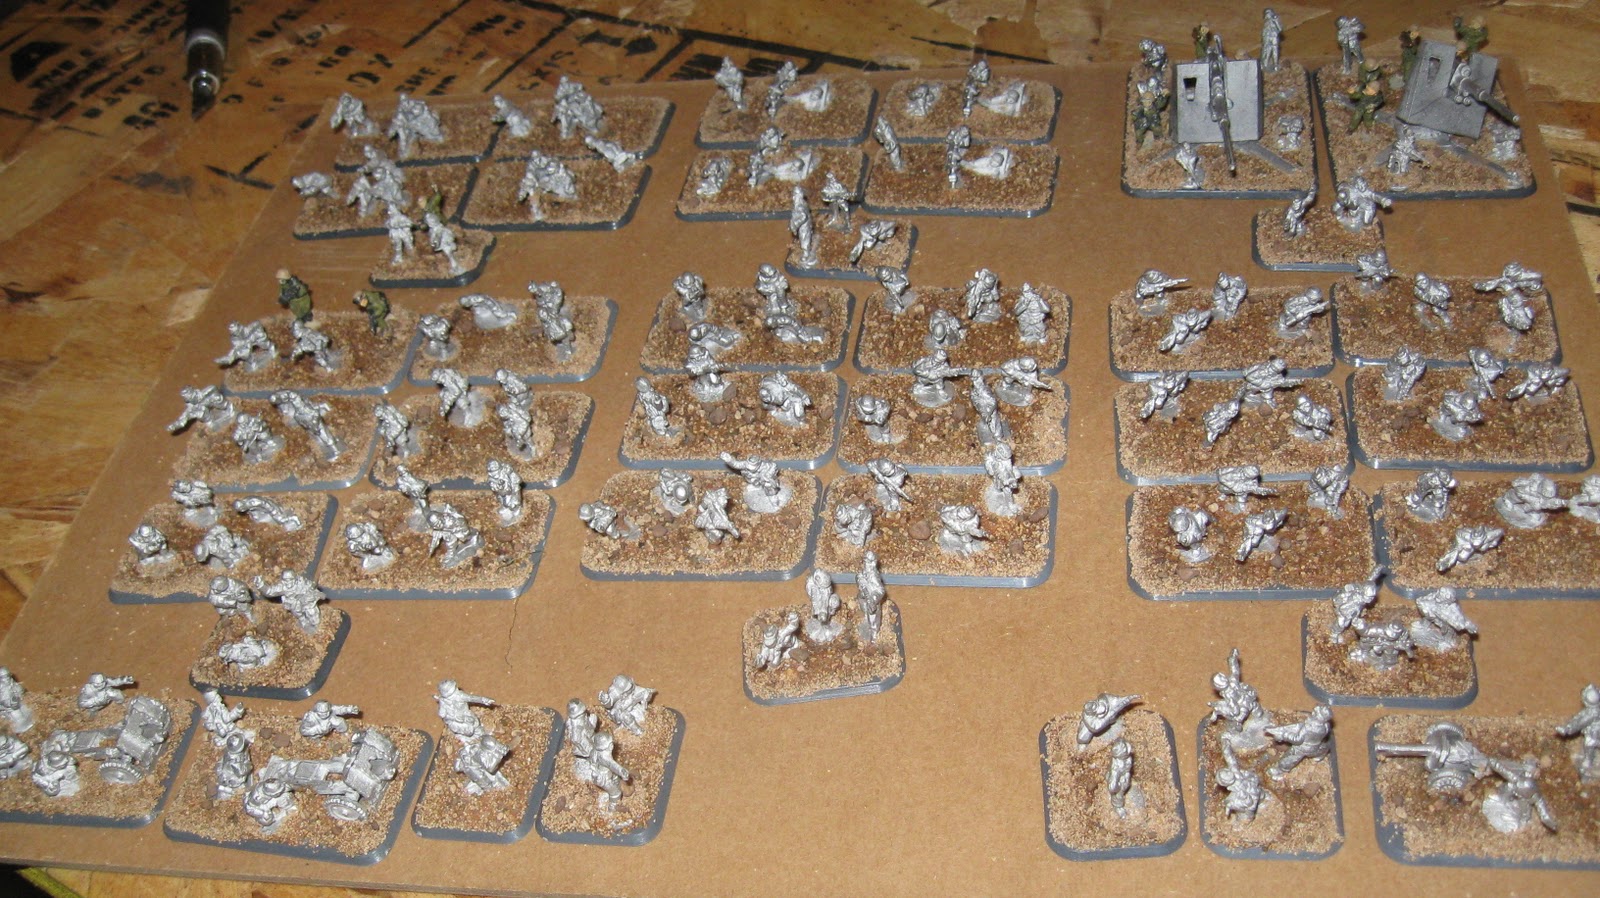
So last week, while failing to keep up on the blog, I was frantically jumping into the hobby world.  My Flames of War army was suddenly out and being assembled and my Blood Angels were out, finally getting their final touches.  I realized that I had an opportunity to work on both armies at the same time, especially since both needed the same things done- their bases.

I am going to give a quick step-by-step guide on how to easily base your models.  I had to add the sand to my German army before I basecoated it, and I had to finish the sand on my Blood Angels.  So you'll see both here. 

The first thing to do, after you've assembled your models, is to gather all the materials you need.  That list is: 

1.  A dirty old paintbrush.  A standard size or larger is the best, but make sure you don't want to use it for painting anymore.
2. Two bowls of water.  One doesn't need to be clean, just wet.  The other will be for normal painting.
3.  White glue or wood glue.  I use good 'ol Elmers School glue, as it costs almost nothing and is, in fact, the same stuff as PVA glue (mostly)
4.  A tile or palette.  Again, it doesn't have to be clean, just flat.
5.  A paper towel.  If you don't clean your brush out often, it'll die in a bad way.  Don't be that guy; respect the paintbrush and bring a paper towel.
6.  A smaller bowl of sand or gravel (or very fine ballast if you're a train guy).  I use GW's old sand as it was perfectly fine and included scattered pebbles already. 
7.  The models.  Don't be dumb, it's why you're here.
8.  A good paintbrush.  Standard or larger works great.
9.  Four colors:  a dark shade, a basecoat shade, and a highlight color, and the color to go around the ring.  I use Scorched Brown, Snakebite Leather, Bleached Bone, and Catachan Green for mine.  But if you'd rather do a desert, arctic, or urban basing style, you'll need different colors.  Just match up the colors and the style- desert:  Vomit Brown, Desert Yellow, Bleached Bone; arctic:  Ice Blue, SW Grey, Skull White; urban:  Chaos Black, Charadon Granite, Codex Grey.  You get the idea, it isn't difficult (luckily).

So once you have your materials, you gotta get the bases ready to recieve the sand.  First, squirt some glue onto your tile.  Next, add water with your dirty paintbrush in the normal way.  You want the glue to be the consistency of gravy, so don't add too much water.  Finally, using your dirty paintbrush, simply apply the glue to the base of the model (in between feet and doods) as though you were painting it white.

Once you have the base appropriately covered in glue, simply dip the model straight into your bowl of sand.  Drown the base deep below the sand.  Be sure to hold the model while you do this, so your hand doesn't get in the way of the base.

Pull the model from the sand-bowl and, using your finger, wipe the glue and sand from the ring of the base (that's the outside border, if you're working of FoW).  This is purely for aesthetic purposes and some people don't do this, preferring the sand to cover all of the base of their models.  I think this looks silly. 

Once you've done this, set the model down and move on to the next one.  Sadly, it takes the glue a couple of hours to fully dry.  Luckily, I always work on batches of models, so I have plenty to keep me busy while I wait for the glue to dry.

See?  And there's still more.  There's always more...

After the glue has dried, take your entire army and prime it up.  The glue will hold the sand onto the bases from the bottom, while the primer will seal the sand from the top.  Also, this cuts down on your work for later. 
I typically don't base my models before I prime them, and wait until the whole army is fully painted.  I learned different, and it's a true disservice to my training.  However, it doesn't really make a difference to the finished product.  Really, this step is a safety net and cuts down on later work.

Once the bases are completely dry and solid, it's time to paint them.  DO NOT ATTEMPT TO PAINT 'ALMOST DRY' BASES!  It's an epic fail everytime, and usually removes the sand from the base.  Save yourself the frustration and wait a couple of hours before painting the sand.
To paint the sand, simply grab your good paintbrush and pop open the shadow-color paint you've chosen.  Create your puddle of paint on the tile (not near the glue) as normal, and then paint it onto the sand.  If you add a little more water than normal, you'll find the paint actually 'seeps' into the sand faster.  But don't add too much water as it'll 'wash' the sand instead, and that looks terrible.  After basecoating the sand, set the model down and let it dry.  This'll take a couple of hours again as wet sand doesn't dry quickly. 

After you're SURE the shadow coat is dry (and you must be sure), it's time to add the next color.  Using your good brush, simply drybrush the base-color paint you've chosen.  It should be starkly brighter than the shadow coat, as the drybrush should be rather heavy.  This may require you to do multiple layers of drybrush on the base to get it right, but it's worth it. 
Once you've drybrushed all the models with the base-color, it's time to finish the sand.  Simply use your highlight-color paint and good paintbrush to drybrush the last layer on.  This layer is literally a highlight for the sand, so don't drybrush too heavily in this step.  Luckily, there's no dry-time involved for both of these steps.

To finish the bases, pull out the ring-color you've chosen, grab that good paintbrush, and prepare for the hardest part of the process... 
Create a puddle of the paint on your tile (away from the shadow-color and glue) and add water as normal using your good brush.  It generally helps to add less water at this stage, as the paint already has a hard time sticking to the outside of the bases.  Then, using your good paintbrush, basecoat the outside ring of the base (or border, if you're working on FoW).  Be sure not to overpaint onto the sand or the model's feet.  Even more importantly, DO NOT touch the model with paint on your fingers.  I can't tell you how many beautiful models I've ruined at the last minute, just because I was sloppy in basing.  Once you're done with this step, simply put the model down and marvel (and clean out your brushes one last time).  It'll take almost an hour for the paint to fully dry, so that's an hour of admiring you can pile onto your doods!

You can also add static grass, flock, and other decorative things to the bases.  That'll be another blog sometime in the future.  For now, it's all about the basics.

Tour of Jay's Workshop

Because of the illustrious success of Jay's Workshop, I was approached for a tour.  My camera, a Canon, was curious to see where I worked and how Jay's Workshop was made.  So after I put away the Doomsday Device (I don't need the government seeing it), I conducted a tour.  Without further ado, here's the international headquarters of Jay's Workshop.


It's important to note that this may look like a garage, but that's simply not true.  A garage stores vehicles, cleaning supplies, and lawn care materials.  This place is storage for a mower and such, but otherwise, it's all game room.  So don't call it a garage, it gets offended...

So working my way from the kitchen door in and around in a clockwise manner, here's the breakdown:

This first sector is made up of my hobby supplies and terrain.  You'll see a paint rack (with every color GW has made since 1998) which I was lucky enough to buy off a game store that was closing down.  Sadly, I still have too many paints for it, but at least I know where to look first. 
Behind that, you'll see a bunch of giant tupperware boxes.  The top gray one is full of primers, spraypaints, and extra paint racks and tiles.  The rest are glorious.  Each of those totes is full of terrain or terrain-making materials.  I can build pretty much any 28mm battlefield you can think of, as well as epic scale (10mm), and a good amount of other stuff.  One day, I hope to own a game room with lots of game tables, and I WILL have beautiful terrain for all of them.  Hopefully, y'all will see me starting to work on some of it sometime before I die.

The 2nd sector is books.  I have every codex and magazine that Games Workshop has put out since 1990, and alot from earlier.  The cool part is that I have some random models and collectables over there as well.  It gives me a great resource of random stuff to grab on my way to the restroom (sorry, Seinfeld fans)...

Next comes my sustenance sector (in most offices, they call them breakrooms or kitchens) and consists of a very angry, if not very effective, mini-fridge.  In that mini-fridge is my ice tea, about four gallons of water, and some amount of candy.  Before you ask- no, I didn't 'tag' it.  I bought it from a friend, who got it from some guys that are, well, let's just call them proud.  Since I grew up around this stuff (yes, I can translate most of it, but I won't.  Take that!) it doesn't befund me at all.  I'd clean it off, but I think it gives my fridge character.  Next to that, you'll notice my radio and more boxes.  The radio (which used to be an ipod port but was broken) is what I use to drown out my wife as she yells at me for something.  As useful as food and drink is to life, so too is loud, distracting music.  Those boxes are all full of DnD and other role playing games I've collected since '87.  Unfortunately, I'm not into RPGs anymore, so those books have seen very little sunlight in many many years.


Now finally comes my favorite sector of the workshop- the stock shelves. 
After nearly a decade of working for a game shop, I have amassed a huge amount of stuff (mostly because I made good money and also got a discount.  That always helps).  Now before I start bragging about what I've got hidden on these shelves, please note that I am an army elitist, and so collected lots of what I liked, not just everything that was released.
This shelf, starting at the top and working down, includes my Specialist Games stock, my Flames of War German army leftovers, and a few extra models from other game systems.  There's a massive box full of bases (just bases) up there as well- always handy.  The next shelf is gaming supplies, made up of hundreds of dice, tape measures, templates, etc. After running tournaments for years and years, I am now well prepared to host a grand tournie.  Below that is my third space marine shelf, below that is my Lord of the Rings box (with more models than most avid fans will ever have) and all four of the game sets still sealed in plastic.  That's right, I'm saving LoTR.  Contrary to most of you gamers out there, LoTR is a fantastic game and will be worth mad bucks later on (when hobbits are dead again).  What you can't see on the bottom shelf is my Rogue Trader and FF stuff.  Between my all-metal mk VI space marine army and the awesome board games, this shelf is easily one of my favorites.
Next is my middle gaming shelf.  The top is full of my Warriors of Chaos leftovers, (making about 4k worth of models, all while I already have 4k built) as well as my VC bits.  Those are going away- I have no more plans on an undead army.  Below that is all High Elf bits (around 10k worth, while I already have 6k built and mostly painted) and below that is my Empire (insert similar story here).  In fact, you can even see the built portion of the Empire army precariously perched atop the box, waiting for the day they'll see a paintbrush again.  Below that is my wife's box of stuff- including eldar, space wolves, and sisters of battle.  Since she shows the interest level of a goldfish in my toy soldiers, I'm pretty sure I can claim this stuff as my own.  Next to that is my bitz box- full of skaven and orks and all kinds of random things.  One day, I'll actually have to inventory that box...  Below that, on the shelf you can't see, is my Heroquest, Epic, and BFG bitz.  Sadly, nobody at all plays these games around here, relegating that shelf to 'favorite, but unused'.
Finally, the last stock shelf.  Better yet, this is my most commonly visitted shelf.  On top is my Chaos stuff, including space marines and daemons.  Although I already have a 2k army built, this stuff is on standby for expansion.  Next to that is my massive Tau army, shoved into a small box.  Being cow-people means that they don't mind being squished together into pens, so I've tossed them in there to wait.  I do have a Tau army built, but as with Chaos, I'm ready to expand.  Below that is my Eldar bitz shelf (same story as before) and three extra Imperial super-heavy tanks.  Below that is the IG shelf, leaving me more than enough stuff to expand my armored regiment and infantry support.  It all adds up to alot, as Imperial Guard deserve.  The next shelf down is my first Space Marine shelf, while the bottom shelf has space marine stuff too, but it's mostly just a resting place for unfilled figure cases (now only two left!)  You'll see a minor level of organization in the Space Marine stuff- that's by chapter.  There's a pile for Dark Angels, a pile for Blood Angels, and then just SM stuff.  This poor shelf never gets a break, let me tell ya.

Wanna know what a motorpool looks like?  Here's my first one.  There's all kinds of stuff stacked on that table, from IG to Eldar to SM to Chaos models for Warhammer.  My son, like most young boyz, loves this table more than anything else in the workshop.  It's a constant battle to keep him off it.
Below the table, you'll see vehicle bitz boxes and even my second motorpool-in-a-tote, just for IG.  I know it's not how you're supposed to store tanks, but I have more than enough tanks already.  Besides, if they break and chip, I have plenty of glue and paint to fix it. 

And here's my armies sector.  There used to be five more figure cases over there, but I've had some success selling armies, so the pile slowly shrinks.

From top to bottom, left to right:  Blood Angels and Inquisition support (3k), Deathwing (2k), Word Bearers, Eldar, Tau, Epic SM and IG (22k and 7k, respectively), and BFG for SM and Imperial (2k and 3k, respectively).  Then there's my Death Korps (1500) and my Cadians (4k), and then my LotR (more than I'm willing to count, because it's four figure cases of good and evil models).  The smaller cases in front are both full of High Elves and the red cases are filled with Warriors of Chaos and Ultramarines (the Ultras are about three battle companies worth.  I do love me some Ultramarines).

Needless to say, I have plenty of options when I finally decide to play.  If only that Kirby wasn't in the way, then I'd have the motivation to play.  Damn you Kirby.  (For those of you in the know, that is a reference to more than just a vaccuum.  For the rest, just remember that I'm disappointed in Kirby.  It'll make sense sooner or later...)

Last, but not least, is my terrain sector.  Right on top is the third motorpool- a company of Leman Russ tanks (to go with the company under the table) and a couple of Macharius super-heavies.  Also, the Enterprise D is up there.  Yes, I am a Star Trek nerd, specifically a Trekker (not a Trekkie, there's a big difference.  I was married in normal clothes and spoke English, which is not a Trekkie's way).  And the Galaxy class is, er, that's another blog far in the future.  Sorry.
Below that is 4 more super-heavy tanks, one day hoping to be seven.  Normally, you can't use these tanks in the game, but I have them anyway.  Below that is my Fortress of Redemption (a Deathwing army NEEDS a fortress, after all), and below that is my finished terrain most often used.  This shelf is my brother's favorite shelf because he loves to set up the battlefields.  Funny enough, he really doesn't care about the game.  Just goes to show how smart GW was in starting to focus more on terrain kits.

Now we've seen the all-around view of the workshop.  You've seen my collection, my [minimal] organizational skills, and my environment of inspiration.  Note that I still haven't hung up the scores of posters that I have, but that's not something I'm really worried about now.  Most of my inspiration comes from the center of the workshop- the table.
This is what my table looks like most days.  Since I don't have any gamer buddies down here, I don't often get to battle on it.  Because of that, the game table is more or less a workbench.  Typically, I'll turn on the radio to my local rock station (of which there is only one good one), close the door into the house, and just dive into my models.  Here's what I typically look at when that happens:

That's right- I'm not using any fancy stuff.  No engineer's glass here (that's the magnifier with light that attaches to tables.  They're really cool if you can get one), no daylight bulbs (in fact, you can see the poor lighting in the photos.  This also explains why my highlighting has to be so stark- I can't see!), and no special brushes or water or wet palettes.  In my opinion, I have the king's version of a paint station, and it all cost me next to nothing.  If you need more than this sorta setup to hobby, you're putting too much into it.  If you have more than this setup for your own workshop, color me jealous.  But I'm happy...

And there it is, Jay's Workshop.  I hope this gets you to thinking about your own man-cave or workshop, and maybe even gets you working in it.  If you are just a camera wanting a tour, it's time to go- you've gotten yours...

Tuesday, February 22, 2011

Damn you, TV!

Recently, I started this blog as a way to motivate and advertise my hobby stuff.  I've been faithful and dependable, up until last week that is, as far as regular posts and (hopefully) engaging material.  It's been about Ultramarines, the hobby, and even a couple of Blood Angels.  But then, my TV revealed a blog-stopping conspiracy...

 
 The Discovery Channel apparently ran a 10 part series, known as 'World's Greatest Tank Battles'.  This show is all about the battles using tanks and how the men and equipment were effective.  As far as I can remember, they've made a show for Kursk (the largest tank battle ever), Ardennes (I think that's the Battle of the Bulge), 73 Easting (from the first Gulf War), and the Canadian assault into France (I really can't remember the name of the battle right now).   If you haven't seen this series, I highly suggest it.  But make sure to look for it on the Military Channel.

 So, while I hobby and paint, I usually have on the TV turned to any number of channels, all awesome.  It happened that night, as I sat in my recliner (you know, the one every man has in his living room- the kingdom's throne), and I flipped the channels to get into my painting mojo.  The night before, I watched the Battle of 73 Easting and enjoyed it muchly- for the 5th time.  But tonight wasn't expected.  When I turned to the Military Channel, there was the show.  And this time, it was one I hadn't seen before- the battle of El Alamein (or both, to be fair).  Now, that's my favorite WWII battle! 

As it turns out, I have more than one game system.  On top of 40k, I also play Warhammer, Lord of the Rings (gasp!), War Machine, and even Flames of War.  And I can blame my FoW habit on one of my Warhammer buddies.  He wanted my Orcs and Goblins and was willing to trade me a German FoW army.  I took the trade.  Turns out, I got a really good deal.

After I finally organized it all and found that I had so much, I gave an infantry company to one of my buddies, another infantry company and some tanks to another buddy, and I still had 2 companies and a ton of tanks left over.  For those of you that don't play FoW, what I had started with equated to around $600 worth of stuff!  With my good fortune in this deal, it would be silly not to get into the game.


So I'm sitting back, intently watching this program, watching as Rommel forces his army to crush the British 8th army under their tracks.  I'm mesmerized by the super cool figures such as the numbers of infantry and tanks that took part during various stages of the months of battles.  I'm totally jazzed by the descriptions of the tanks and how the German armored cans were superior to the British in every way (except numbers).  I couldn't tear myself away from the show, it was awesome!

Very Brief overview after the first battle of El Alamein to the end of Afrikakorps (1942-43)

In June of 1942, Rommel attacked Tobruk, finally breaking the stalemate of Operation Theseus.  The British forces there had to surrender, after fighting to allow the remainder of the forces to form a line at El Alamein.
From there, Montgomery (the new British commander) launched an offensive in October, forcing Rommel to quit the battle and retreat the German forces all the way back to Tunisia.  At almost the same time, the American forces landed in Western Africa and were making their way to Tunisia.
Not to be outsmarted, Rommel ordered a counterattack into the new American forces and then went straight at the British 8th army in an all-or-nothing attack.  Now outnumbered more than five to one in tanks and men, Rommel's forces were decimated and eventually had to surrender in May 1943. 

The Germans had place such trust in Rommel that he was flown to Northern Europe, and placed in command of defenses against allied invasion.  Obviously, he failed in this duty (most blame the Fuhrer).  But Rommel is widely and highly regarded as one of the greatest military commanders in the history of the world.

Super-Brief History of Erwin Rommel

In WWI, he was an infantry commander and was very successful.  After the war, he published a book called 'Infantry Attacks!', which solidified his reputation as a competent commander.  In WWII, the high command placed Rommel in charge of operations in Northern Africa, using the new 'blitzkrieg' tactics and Germany's awesome Panzer tanks.  The first couple years in the desert showed a poorly-supported and overly-aggressive army achieving success after success against the seasoned British soldiers.  But Rommel's lack of supplies and reinforcements ultimately cost him victory.  He was then reassigned to Northern Europe.  Hitler was nearly assassinated in the now-famous July 20th plot, and officers under Rommel were found to be responsible.  The Fuhrer placed him under house arrest and, most likely, forced Rommel to poison himself.  Today, Rommel is studied by military commanders all over the world, utilizing his theories on infantry, armored, and even 'organic battlefield' strategies.  Rommel is truly a military mastermind.


The Basics of Germany's 'Afrika Korps'

Rommel had many tools at his disposal that would make any other commander green with envy.  He had two full Panzerdivisions, manned by well trained and experienced soldiers.  He had thousands of trucks and guns, fitting the German principle of 'few men, many guns'.  This allowed his armies to be very fast and bring an immense amount of firepower onto the enemy.

The most feared weapon in Rommel's army, however, was the dreaded Panzer tank.  Initially, the fast Panzer IIs were enough to launch the war, but advances in British wargear meant the II was obsolete quickly.  Most of the 15th and 21st Panzerdivisions were commonly stocked with Panzer IIIs- a fantastic tank.  With 2" of armor and a 2" gun, it was the match of anything the British had in their arsenal.

Using fast, outflanking maneuvres, Rommel effectively used his Panzers to keep the British forces under constant pressure.  It wasn't until the introduction of American tanks into the Allied effort in Africa that the Panzers had to evolve again.  Germany answered with the Panzer IV, the last mark of Panzer before the Panther took over in Europe.  In the late stages of the war, Rommel even had a few Tiger tanks, fresh and meant for the Eastern Front.  Although the Tiger is the most famous and feared tank of WWII, it was the Panzer that won most of the battles...


So you're wondering why I would curse the TV, only to advertise for them while presenting a history lesson.  Well, it's because this very same show; this very same history lesson got me excited to get my FoW army going.  Last week, my 40k hobby was completely put on hold.  Space Marines and all that stuff had no place in my workshop, as I frantically built and prepped my army of Germans.  The TV had chosen to take this program from the Discovery Channel and place it on the Military channel, KNOWING it would crush any motivation I had in scifi.  They KNEW I was going to have a Pavlov-like reaction and leap into my pile of 15mm soldiers.   Damn you TV!!!

So after all that, here's my army (sans the useless stuff like motorcycles and armored cars):
(Sorry, I don't know how to spin the pictures in this blog thingie).
 I chose to do the 10th Panzerdivision.  The division was a very well regarded one, known for its fearless part in the invasion of France and relentless fighting on the Eastern front.  It was added to Germany's Afrika Korps after the first Battle of El Alamein, and had some added advantages over the normal Afrika Korps forces.  


  The infantry, armed for combat in the termperate and forrested European theatre, were equipped with halftrack transports and infantry guns (something the 15th and 21st had to steal from defeated allied forces).  The armored units had the new Panzer IVs and even the Panzer IV 'specials', bringing bigger guns to the late stages of the Africa campaign.  After the disastrous efforts late in the war, the division was given a few tiger platoons, but was annihilated in the final battles before the Germans surrendered.  It was found that alot of the officers involved in the July 20th plot were 10.Panzerdivision, leading Hitler to suspect Rommel.  The division was not reformed again during WWII, but was later reinstated into the modern German army as an honor to those officers who tried to end the war early.

I like that story alot.  Plus, it means I don't have to paint Desert Yellow.  The 10th remained German Grey, and that's a really easy color to paint.  Now that I've done my cursing and shared the history, I guess I actually have to start painting....  damn you, TV.  Damn you.